Showing posts with label Recipe. Show all posts

Sunday, 25 August 2013

Pandan Entremet Cake

It's been a while exams, work. You know the drill. Since I'm all done until October I've got so much more time for crafts, DIY, gardening and obviously baking. I haven't posted any bakes in ages because quite simply the more I bake the bigger I get. And if you follow my Instagram (@sushiturtleslife) you'll know I'm doing the Paleo. So baking is a little more difficult.
But this cake I made for my uncle who always jokes at my blog. It's all in good fun, but he's right food can look great but it's all about how it tastes. So this one was to shut him up basically. Hahaha, just joking Uncle T. I think it went down well, they asked for a second slice. So I'm going to be making this again for a family lunch gathering. Very exciting. I love entremet cakes and have been obsessively googling them since I discovered, but I never saw one made with Pandan cake. Which my family love. I wanted to make a Pandan with a twist. This may frighten you, it's pretty damn fattening. I'd advise you make this for several people, avoids temptation of eating it all yourself!!


Sunday, 28 April 2013

J's Chocolate Mousse Entremet

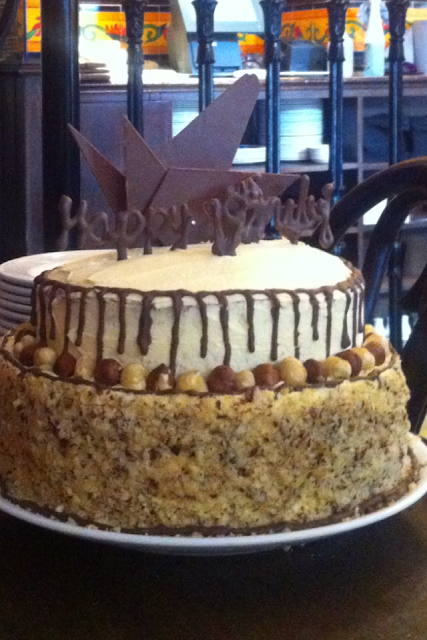
Firstly I appologise for the photos, not the best but you can see the cake so it'll do this time! I baked this for my boyfriends birthday. It had to be something show stopping and like none of my other cakes. But the recipe I followed was a French youtube video for a one portion dish... So I had to make it up along the way. It's almost like a cheesecake but with mousse. So the outter edges of the cake is an eggy sponge with the centre being all chocolate mousse. With a layer of strawberries and another praline. This takes a lot of time, due to the chilling steps.


Recipe:
Cake:
2 eggs separated. Whisk the whites to form peaks. Mix the yolks with 100g flour, 100g sugar. 
Fold in egg whites. Spread thinly and evenly on a baking tray. Bake at 180 celcius for 7-10 minutes.
Using a cake tin (preferably with a removable base) Cut a long strip with height of tin and a base.

Praline:
60g Almond flakes. 100g Sugar. Melt the sugar without water in a saucepan on medium heat. As the edges being to brown turn the heat low and allow all the sugar to melt completely and gain a dark brown colouring. At no point should you stir the sugar, before it has become liquid. Fold in almond flakes and spread onto a well greased baking tray. Or using 2 silicon sheets, use a rolling pin to flatten. Leave to set.

Strawberries:
Cut 6 large strawberries into small even chunks. Add to 20g of caster sugar and simmer in a sauce pan until the excess juice from strawberries has become thick and concentrated.

Mousse:
Using 300ml of whipping or thick cream (UHT will not whip). Beat the cream until thick and add to 200g of melted chocolate. Stir in gently.

Assembly:
Line your cake tin with the sponge. Making sure there are no gaps by gently squeezing the edges together. Using the sauce from the strawberries, brush on the juice evenly to the cake. Next spoon in 1/3 of the mousse mixture. Layer with strawberries (It is important that minimal liquid is added or it will melt the mousse) Leave to set for 20 minutes. Layer with 1/3 more mousse and sprinkle over chipped up almond praline brittle. Leave to set for further 20 minutes. Layer with the remaining mouse and leave to set for 2 hours. 
Once chilled and hard, using a hot pallet knife slide over the cake, using the tin as a guide, to gain a flat surface. Refrigerate for further 30 minutes before removing from tin. Dust with dutch press unsweetened cocoa powder using a fine sieve. Decorate with balls of chocolate ganache, hazelnuts, large shards of almond brittle.

Until Next Time xo


Wednesday, 17 April 2013

Chocolate & Banana Cake

When I really got into big celebration cakes a few weeks back I offered to make a cake for a birthday my brother was attending. I needed an excuse to practise without having the need to eat any hahaha! I surprised myself with how this cake turned out. Very proud moment, although I think the rose does need a little more colour!


Since this was an 18th birthday cake, I spiked the buttercream with a little Baileys. But the recipe below is without. Just add enough to your own taste, because who doesn't love a bit of birthday Baileys!

Friday, 12 April 2013

Hake on Skordalia with Seared Spinach, buttered Muscles, Oyster Mushrooms and Sundried Tomatoes

Masterchef makes my mouth do some serious drooling. My belly will start rumbling and I'm itching to get into the kitchen. So my new tactic, eat before I watch! Yeah, I'm that bad. I get some serious cravings if I'm even slightly hungry while watching Masterchef. So for lunch yesterday I wanted some serious food going on. I'd never tried Hake before yesterday so I had no idea what to cook with it! All I could gather from asking around was that it tasted amazing. It was on offer so how could I not really? I looked around at a few recipes and saw it's mostly teamed with bold and strong flavours, so I just imagined a sea bass flavour and worked around it. I'm so pleased with how it turned out! My private home taster even said they'd be happy to pay £15 for this dish! But hey they may be slightly biased no?


I don't care! A compliment is a compliment! Especially with all the thought I put into this! I really do hope you give this a go. It's like eating out, but eating in. Hrmm. It's fairly simple to make, just takes a lot of concentration, with so many components! Skordalia, is Greek in origin and is said exactly how it's spelt. If you've been watching Masterchef, yes I did learn this from John!


Recipe:
Skordalia - 
5 large potatoes
3 tbsp butter
2 tbsp olive oil
2 cloves of fresh garlic
1 tsp salt
1 tbsp lime juice
Enough milk to cover potatoes.
Peel and chop potatoes to small squares. Boil in a saucepan with milk (no water!) Peel and squash garlic add to potatoes.
Once cooked and soft, scoop potatoes without milk into a blender add remaining ingredients, bled into a smooth mash/puree consistency.

Thursday, 11 April 2013

Orange & Ginger Little Kick Cake

Clearly I had no idea what to call this dessert. This would be my first ever recipe that I've never adapted or taken inspiration from another. I did this freestyle and it was pretty frightening. Mum took me shopping and we came home with an abundance of fresh and delicious ingredients, since she knew I really wanted to make a come back from my mango custard mess. I knew Chili and Lime chocolate is a big, big favourite amongst the chocoholics so that was a definite component for this one!


To sum it up, this is a orange zest Victoria sponge layer, topped with a crumbled ginger biscuit disk, a chili and lime chocolate slice, orange scented custard and a gooey hazelnut caramel collar. It's a mouthful, hence the strange name. But it's not about the name, or the strange presentation of this one! It's all about the big flavours packed into a small dessert. I'm not so sure what John and Greg would say about my presentation but come on A+ for effort? Please?


Recipe:
Orange Sponge
100g butter
100g sugar
100g self raising flour
1 egg
1 large orange, zest separate
Cream the butter and sugar.
Whisk in the egg.
Add all the zest of the large orange.
Bake on a flat tray at 190 degrees for 15 minutes.
Upon removing cake from oven, take half the orange and squeeze the juice evenly coating the cake.
Cut with chefs ring after cooling.

Crumbled ginger biscuit -
100g ginger nut biscuits
3 tbsp melted butter
Crush the biscuits to a fine consistency.
Mix in butter until all crumbs are coated.
Spread flat and even on a baking tray and bake for 5 mins.
Cut with chefs ring after cooling.

Flavoured Chocolate - 
100g chocolate chopped
1 lime, zest
1 tsp chili flakes
Melt the chocolate over a ban marie.
Spread thinly on grease proof paper.
Sprinkle over lime zest and chili while chocolate is still wet.
Leave to set and cut with chefs ring.

Orange custard -
I cheated a little here.
Using a standard custard powder mix, add the zest of 1/2 an orange.
1tsp of vanilla and leave to set.

Hazelnut Caramel Collar -
40g Hazelnuts
1/2 Cup caster sugar
1/4 Cup of water
2 tbsp golden syrup
Simmer in a saucepan sugar, water and syrup.
DO NOT STIR.
Chop Hazelnuts finely, either with blender (quicker) or by hand.
Once sugar mix has turned a light brown caramel colour remove from heat.
(This light brown will have a gooey texture allowing you to mould the caramel. Other wise a deeper colour will become brittle)
Add hazelnuts and quickly turn out onto greased baking tray.
Leave until cool enough to handle. Slice 1 inch thick slices and shape around tier of cake.


It seems like a lot of work. It's not complicated in the slightest I would say. It's just a little time consuming but it's worth the effort for a dinner party or treat. It really is packed with flavour and since today is a favourite of mine and mums. Obviously with a big brew and a good show or in mums case a book. Don't forget to tweet me anything you make via @ericahenderson.
Until Next Time xo

Tuesday, 9 April 2013

Drunken Chocolate Soufflé

A week later, not much has changed with me! But recently got a new job with the local Go Karting centre, we had a staff championship Grand Prix yesterday. An hour down the road to Bristol for our regional heats and it's pretty safe to say I came dead last. Yeah, I thought it was going to be a friendly few laps around the track. Boy was I wrong, I got up to the changing rooms and half the lads strolled up with a duffel bag filled with their own jumpsuits and helmets. Oh crap. This is going to be pretty serious. I looked at another recently hired guy and said, it's just me and you. Head to head. It's going to be a free for all. It was, I gave it my all and didn't spin out once! But as an overall centre we won!! So hey, round 2 next week I best get some practise in no?


Anyway to the soufflé, I was attempting to make a gorgeous chocolate and mango tarte with a luxurious chocolate and caramel ganache. I failed terribly at the first hurdle of home made custard mixing in a fresh mango puree. If anyone has a good recipe or tips for this please help me out! I was left with a lumpy brown mess... so that went in the bin. Waste?! I wanted a new challenge and gave up on the mango. This is incredibly easy and I was so shocked that I actually got a good rise from it! Score, smile returned to my face at last. I hate defeat. This recipe only takes 4 ingredients and if your an avid Baileys drinker you've just saved yourself a trip to the shops.


Ingredients:
3 Egg whites
35g Dutch press cocoa powder (unsweetened)
30g Caster sugar
40ml Baileys (or liqueur of choice)

Prep: Using 1 tbsp of cocoa powder and 1 tbsp of sugar. Grease the ramekins and dust with cocoa sugar mixture. To evenly coat. Preheat oven to 190 degrees.

Recipe:
1. Mix liqueur and cocoa powder in a small bowl.
2. In a separate bowl whisk egg whites adding sugar in parts to form stiff peaks. This is roughly 6-8 minutes using an electing hand mixer.
3. Once stiff (You can try the over the head trick if your confident enough!) Spoon half the mix into the choc mix and fold in using a figure of 8 motion.
4. Once mixed in well add the remaining egg mix and repeat.
5. Spoon into ramekins and bake for 13 minutes.

Top Tips: 
 - Be sure to completely coat the ramekins with butter and cocoa sugar mix! This will help the rise.
 - Completely mix in the eggs. No streaks or marbling. This will again effect the rise and flavour, leaving patches of tasteless egg white.
 - Do not knock or disturb the air you've built up or you'll get a flat blob.

This is best served within the first 2 minutes after removing from the oven. This leaves such little time for any other decoration. So if you have something in mind make sure you have it ready! I just dusted with icing sugar because I didn't think they would actually work, hence the lack of photos! They needed a little whip and my usual photo shoots, but there was just no time haha! They look a little grubby on the edges but that never effects the taste eh ;)

Until Next Time xo
Dont forget my giveaway is closing soon, win 4 pieces of diva jewellery! 

Tuesday, 2 April 2013

Blueberries & Cream Profiteroles

Such a gorgeous day in Cardiff today. I hope the weather is treating you well wherever you are! The reruns of the Great British Bake Off have just started up again and they were challenged to make the infamous profiterole. I hate them, but I've only ever had the cheap and cheerful ones. So I knew it was time to make some myself, to my taste with a gorgeous fresh blueberry cream filling. Needless to say, these were the only 3 left after 30. (I did not eat them all to myself.. or maybe I did! Hrmm)


The clocks went back this weekend for the start of the 'British Summer' I'll believe it when I see it. It's still freezing today, but the sun is out so we'll just take what we can get before we have to jet off. The summer always brings to mind, fresh fruit with a healthy dollup of cream and some cocktails in the sun. The latter will have to wait for the temp to increase tho!


Ingredients:
150ml cold water
50g butter cubed
60g strong plain flour
2 eggs
1 tsp sugar
1 tsp vanilla extract

1 cup blueberries
250ml whipping cream

1. In a saucepan heat the water and butter together until a light simmer.
2. Before the water boils, we don't want to loose any by evaporation, take off the heat and add flour.
3. Beat rapidly until the mixture pulls away from the sides and forms a ball.
4. Add an egg beat well before adding another, the mixture will look like its splitting at this point, but with more mixing shall come back together.
5. Beat until you have a glossy mixture, spoon (or pipe) onto a greased baking tray and cook for 10 mins at 200 degrees.
6. Now turn the heat up to 220 degrees for a further 15 minutes.
( Don't be afraid of the rolls slightly browning, if they don't they will become soggy inside!)
7. Prick each with a tooth pick and transfer to a cooling rack to dry out.

8. Blend blueberries to make a puree.
9. Add cream and beat until thick.
10. Use a tablespoon or pipping bag to fill.
11. Garnish with fresh fruit, mint and a dust of icing sugar.

Until Next Time xo
Don't forget to enter my giveaway bellow!! And tweet me any of your pictures following my recipes or beauty tips @ericahenderson :) 

Saturday, 30 March 2013

Asian style Sea Bass

Who knew the UK is an island?! Well, I'm just kidding but in all seriousness so many people forget! We are completely surrounded by beautiful coastlines boasting hundreds of different fish, mollusks and crustaceans of all types. But did you know most of our produce is being shipped to the Mediterranean? Why? Because Brits just don't want to eat it, there isn't a demand for this protein as their is abroad. Which is a shame, because so many people see crabs, lobsters and oysters as a delicacy. But years ago, all these fish were readily available at such a reasonable price to us here. When the demand slacked, the produced moved and began being shipped away. Here's to celebrating gorgeous fish. 


A good piece of fish, funnily enough, will not smell fishy! This is just a misunderstanding that I had as a child. I hated the stinky smell of fish and rightly so. A good fresh fish will smell of the sea and far from that pong. Unless its doused in some Thai fish sauce (which my mum never used sparingly).
I defy you to get this recipe wrong. If you can burn an egg then maybe take a few steps back! 

Recipe:
1. Slice 1 tbsp of ginger, 2 spring onions and a tbsp of coriander.
2. Fry your Sea Bass, skin side first to brown. Then sear the other side.
This will give you a crispy finish with a juicy, soft flesh.
3. In a small saucepan, warm 2 tbsp of sun flour oil.
4. Once hot, add ginger and spring onion. This is just to remove the raw edge.
5. Cook for 1 minute add 1 tbsp of soy sauce and serve.
6. Garnish with coriander.

This recipe is so simple, but so delicious. If you love spicy Asian food, don't forget to add some chili flakes or a few slices of fresh chili. It's such a quick and simple dish, but full of flavour. You can plate this up individually as I've done. But more traditionally with Asian food, it's each dish on one plate. You get a small bowl of boiled rice and go nuts. The best way, obviously. But you gotta fight for the most popular food or you'll loose out. Be on your toes in Asian house holds, haha!
Until Next Time xo


Friday, 29 March 2013

DIY: Wagamama Oyster and Chilli Spiced Salmon and Udon

If you haven't been to wagamama's then you've probably been living under a rock. Well maybe thats a slight exaggeration, but this Japanese restaurant I would say is the Asian answer to Nandos. A meal costing roughly the same, while being healthy, tasting fresh and with fast service. Your quickly seated in and amongst other dinners to give a more friendly and informal feeling. Or rather my initial reaction a few years ago, saving on space and cramming more customers in. Apart from my mums grudge of paying for Asian fast food, when she could do it herself to her taste, I love a guilty Waga's. But I just warmed my bones up from the frosty, wasteland that is Cardiff city and couldn't bare to leave the house. Sorry Waga's, you just weren't worth dawning the gloves, hat and balaclava again, this time. Time to DIY my favourite recipe.


It was painful cutting this gorgeous slab of fresh Salmon in half, but there was no way I could handle that whole thing. Unless it was in sushi form. Then, Yes. Good bye salmon, hello belly.


As with the majority of Asian cooking, the biggest portion of your time is taken up by prep, once you've got this down. The rest is literally in the wok and serve. 

So, chopping celery diagonally. 1 whole onion diced. 1 segment of garlic diced. A big handful of coriander chopped and some bean sprouts washed.

Gently fry off the onions, garlic and celery. 
Add udon (or noodles of choice)
Add 100ml of boiling water, simmer until moist noodles.
Gently fry off salmon in separate pan.
On high heat add sesame seeds, bean sprouts, coriander and oyster sauce.
Plate up, garnish with more coriander, fresh chilli and wedge of lime.

Until Next Time xo
Don't forget to enter my giveaway!

Thursday, 21 March 2013

Baileys And Nutella, Surprise Cake

I thought I'd do something nice for a friend, since I was working late on last weeks game. Grandslam! And I had no way of getting home, she kindly let me crash with her for the evening. (Did anyone else see the chaos that was a celebrating Cardiff city? It was brilliant and hectic!) Since her birthday was coming up and no one would be around due to Easter recess, I planned a little surprise for her and baked my first 2 tier cake. Proud moment. Haha. 


Monday, 18 March 2013

Wild Garlic Canapés: Gourmet-Home made

You probably already know my new found obsession with the Hairy Bikers and just their love for real food. The best thing I took from their trip to Italy was just how fresh the food can be! James tells me all the time about being in Greece and getting fresh veg and olives almost just picked before you eat them! I'm still dreaming about having a garden full of food, on a sunny bit of land. One day. But on my walk today, we found some gorgeous wild garlic! It was like heaven, literally they sprung up everywhere so quickly! I did the same walk last Thursday and it was all leaves, now its green! Anyway, my Auntie kept talking about some gorgeous wild garlic crisps, that work perfectly for canapes. Oh yes.


Sunday, 10 March 2013

Red Velvet Cake

When I first tried red velvet I fell in love, it was so moist and just had a different taste that I couldn't quite put my finger on. Turns out it was buttermilk, which on its own taste like the midpoint of milk and  yoghurt. Which really isn't very nice, but in the cake itself it works a treat. When making this cake I completely forgot that I put a very light and fluffy Swiss Meringue dirty ice on. So when I stuck my royal icing on top... well it just did not work. It ripped and started to dent and pimple. Ooops.


Saturday, 9 March 2013

Ciabatta Bread

After eating about 30 different cupcakes, my Auntie came out with 'You should make bread, everyone makes cupcakes. Make bread, I love bread!' So I thought, fuck it! I love bread too! Well maybe not that much, but a cold meat stuff sandwich is a pretty good damn lunch. Plus having so many people tell me about all the preservatives and chemicals they put in food these days, I'm trying to make more things myself and keep it simple. Fresh and REAL ingredients. This didn't quite pan out this time because I wanted to keep student budgets in mind and ease, so I picked up a mix from Lidl. But without this it would be roughly the same price, just flour and some dry active yeast!


Friday, 8 March 2013

Mother's Day Cupcakes

This post is slightly late in the making but you've still got time!! Mothers day is on Sunday if you have forgotten, but it's hard to with all these adverts everywhere! If you were thinking of getting your mum something from of the shelf... something she could probably predict, or useless cheap pamper box sets don't bother! This is much cheaper, more heart felt and delicious.. of course!


Tuesday, 5 March 2013

Chicken in 15 minutes

I've been obsessed with Jamie's 15 minutes meals recently. Fast food, but healthy food. I seem to have no sense in planning my meals, I'm either spending ages planning a meal and waiting around to get hungry or just in a complete rush and end up having something crap to eat like a pasty. This wouldn't be so bad if I'd made them myself and froze them or something.. (hrmm maybe I'll give that a go actually!) But if you didn't already know, most store bought pasty's can hide up to around 30g of fat per pasty. Yeah! If you've been following my twitter  then you'll know I've been walking a lot recently and it's so painful to feel refreshed and fit then eat something greasy and well not that flavourful. This trick I got from watching Mr Oliver. It's something I maybe wouldn't do to every meal! But it's just amazing for a faster cook.


Tuesday, 26 February 2013

Kinder Bueno Cupcakes


We've moved! Still crazy recipes, indulgent cakes at Spinach and Specs :) 

I love love love Kinder Bueno's and I've been meaning to try this for ages! It's so creamy and reminds me of being younger with the kinder eggs and playing with the toys. I wanted to capture this so I hid a few little toys in the cupcakes too... well I wish I had but no they aren't that cool. :( Oh well! I think if your going to do this, be prepared to fill your kitchen with hundreds of Bueno bars because its so hard to get that flavour just right! If you like the mix of white and milk chocolate with a hint of hazelnut that's the recipe I have here! But if you really want the proper full flavour, you'll need to use a lot more crushed bars than me.. I'm going to try again. You haven't defeated me yet Mr Bueno.


Sunday, 3 February 2013

I want S'more!

I'm pretty obsessed with American snacks and devastated that Twinkies are not in production anymore! But they can never stop S'mores! If you don't know what they are, its usually a camp fire treat where you squish a toasted marshmallow between two biscuits and some chocolate. Here's my take on a cupcake - S'more fusion. You'll probably want to pick up an exercise DVD when you get the ingredients too. 


Thursday, 24 January 2013

Valentines Day Cupcakes

I'm not sure if I believe in all this commercial Valentines day stuff. But I do think its great to have a day with your partner and just chill out and be romantic. This really doesn't mean being romantic, making time for each other and buying gifts should be limited to one day. But for all you gooey, loved up ladies. Here's a cute recipe to make for your loved ones this February. 

Monday, 14 January 2013

Pina Colada Procrastination Cupcakes

Happy New Year to all my readers! I've been away revising for exams... or not. But I'm back with the first post of 2013! I'm going to save you the cliche 'here are my resolutions'. Along with many of you, I've spent the majority of my days procrastinating. I mean to an extreme! But here's one that turned out worth while... Pina Colada Cupcakes.


Mango... because I forgot to keep some pineapple! 


Recipe:
300g flour
230g soft butter
220g sugar
4 eggs
200ml coconut milk
40ml dark rum
140g pineapple, into chunks
Icing:
230g soft butter
90ml coconut milk
1tsp vanilla extract
580g icing sugar
20ml dark rum
100g desiccated coconut

Pre-heat oven to 180 degrees.
1. Cream butter and sugar
2. Add eggs and mix well after each addition
3. Mix in flour and coconut milk in thirds alternating
4. Fill a third of each cupcake case, top with pineapple chunks
5. Cover pineapple with more cake batter
6. Cook for 20 minutes or until stick comes out clean
7. Mix all icing ingredients together in a clean bowl
8. On a low heat, gently toast half the sprinkling coconut 
9. Wait for cakes to cool before piping
10. Pipe and sprinkle half non toasting and half toasting coconut

If anyone was wondering what tip I used for this, Its just a plain open tip. I will get a photo soon! I apologise in advance for all those who have started their New Years 'diet'. Give up and join us on the dark side!
Until Next Time xo